Create & Publish a Basic Virtual Tour
This step-by-step guide explains how to create a virtual tour in Panoee, from uploading panorama images to configuring scenes and publishing your tour online.
Steps
-
Click “New Project”
From the Panoee dashboard https://studio.panoee.net/dashboard/projects, click the New Project button in the top-right corner to start creating a new virtual tour project.
-
Enter project information and create the project
In the popup, enter the required Title and optionally add a description or category.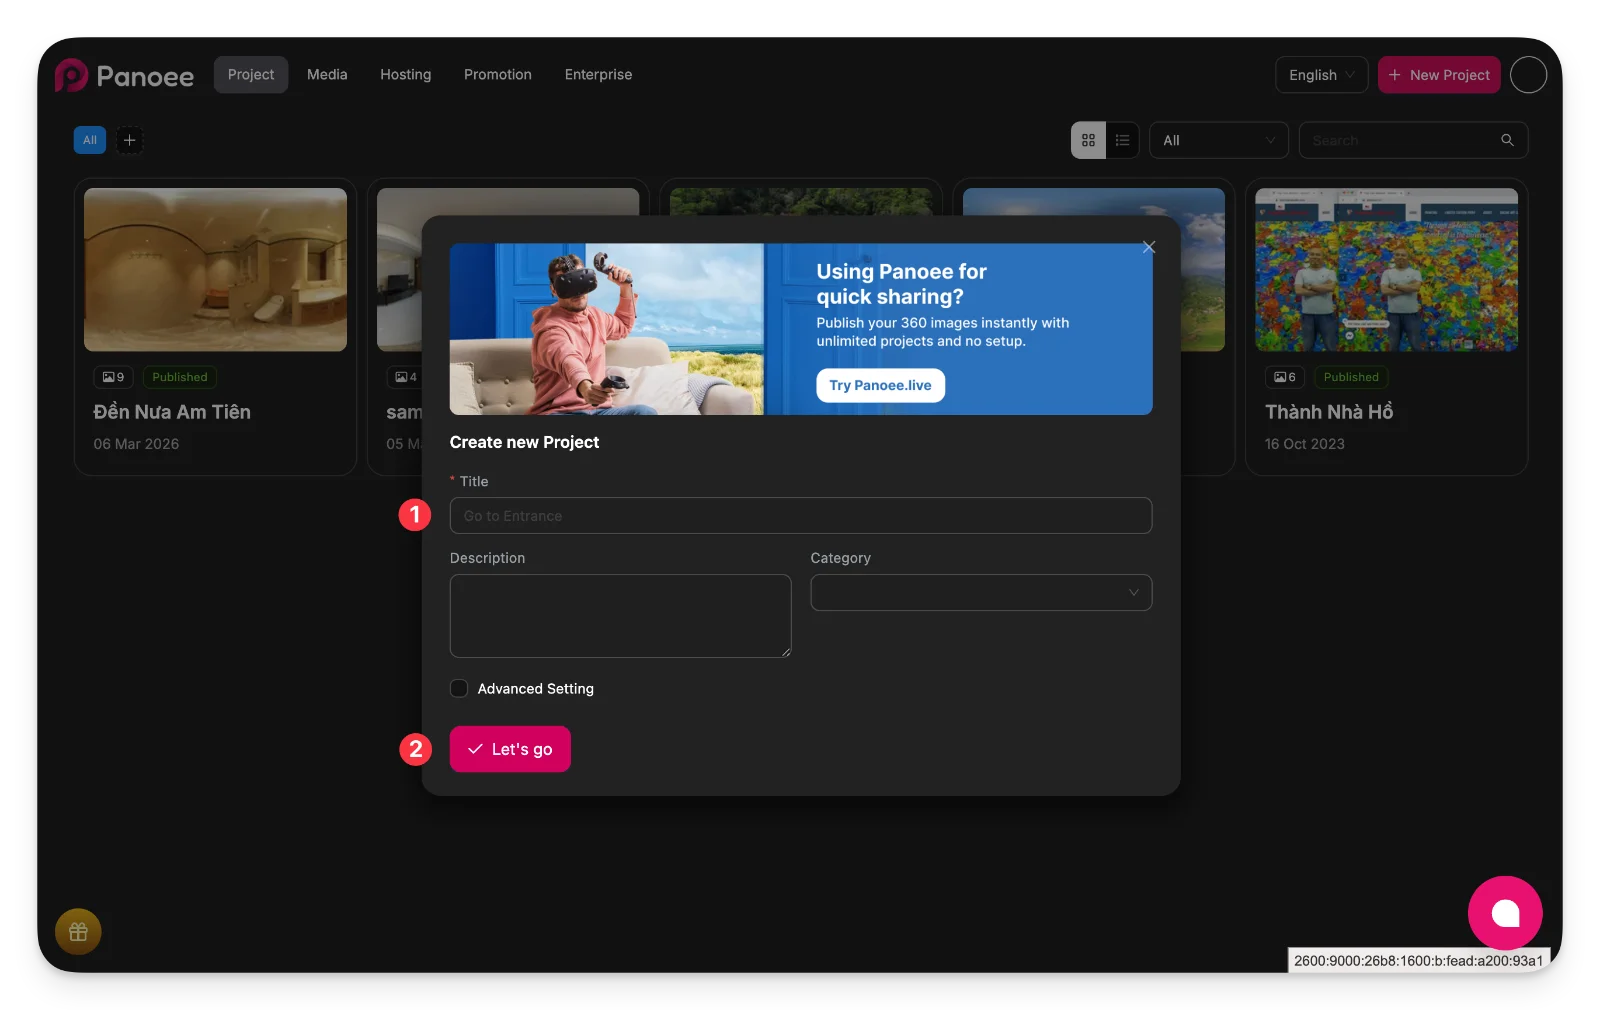
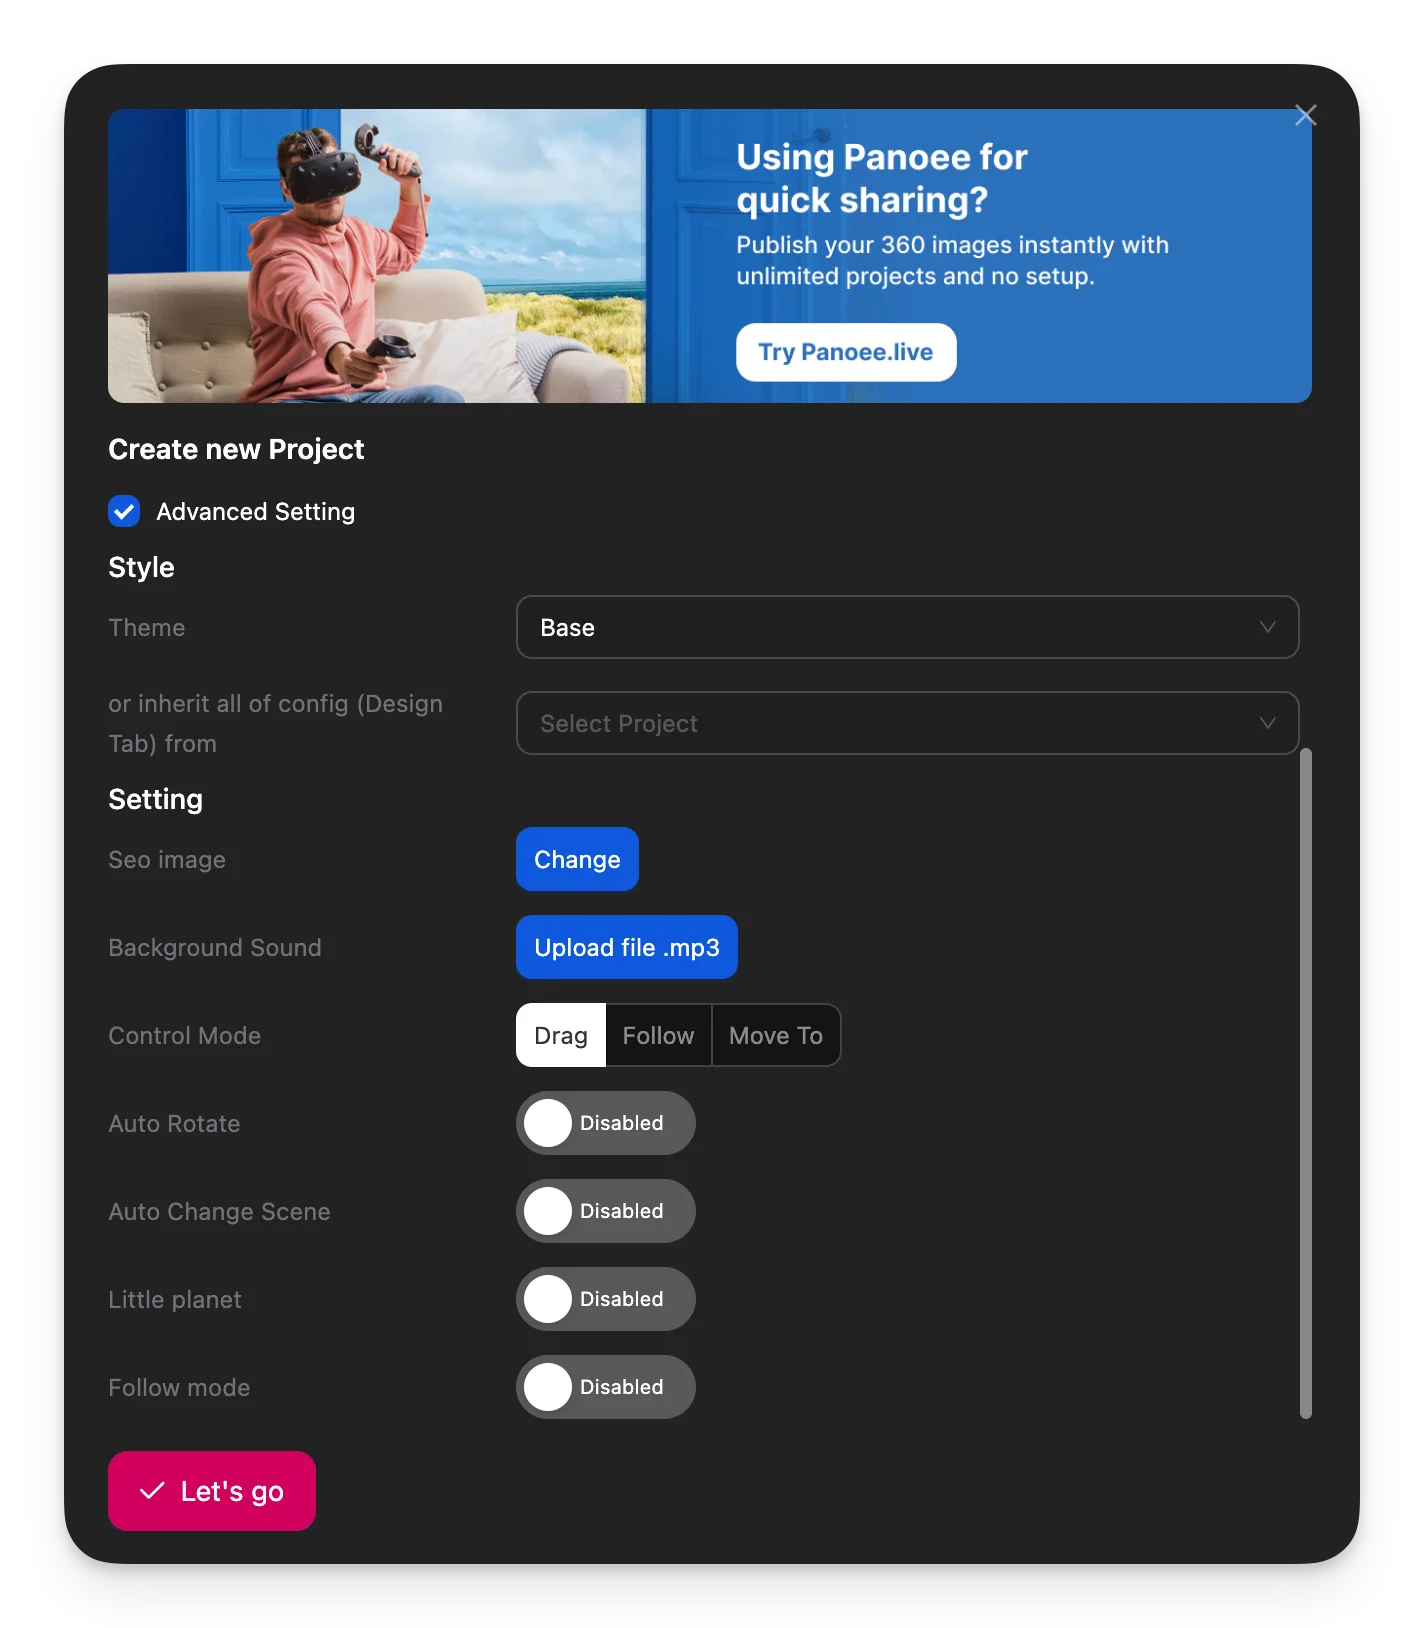
You can enable Advanced Setting if needed, then click Let’s go to create the project.
-
Upload or select 360 panorama images
After creating the project, upload new images or select existing ones from your media library.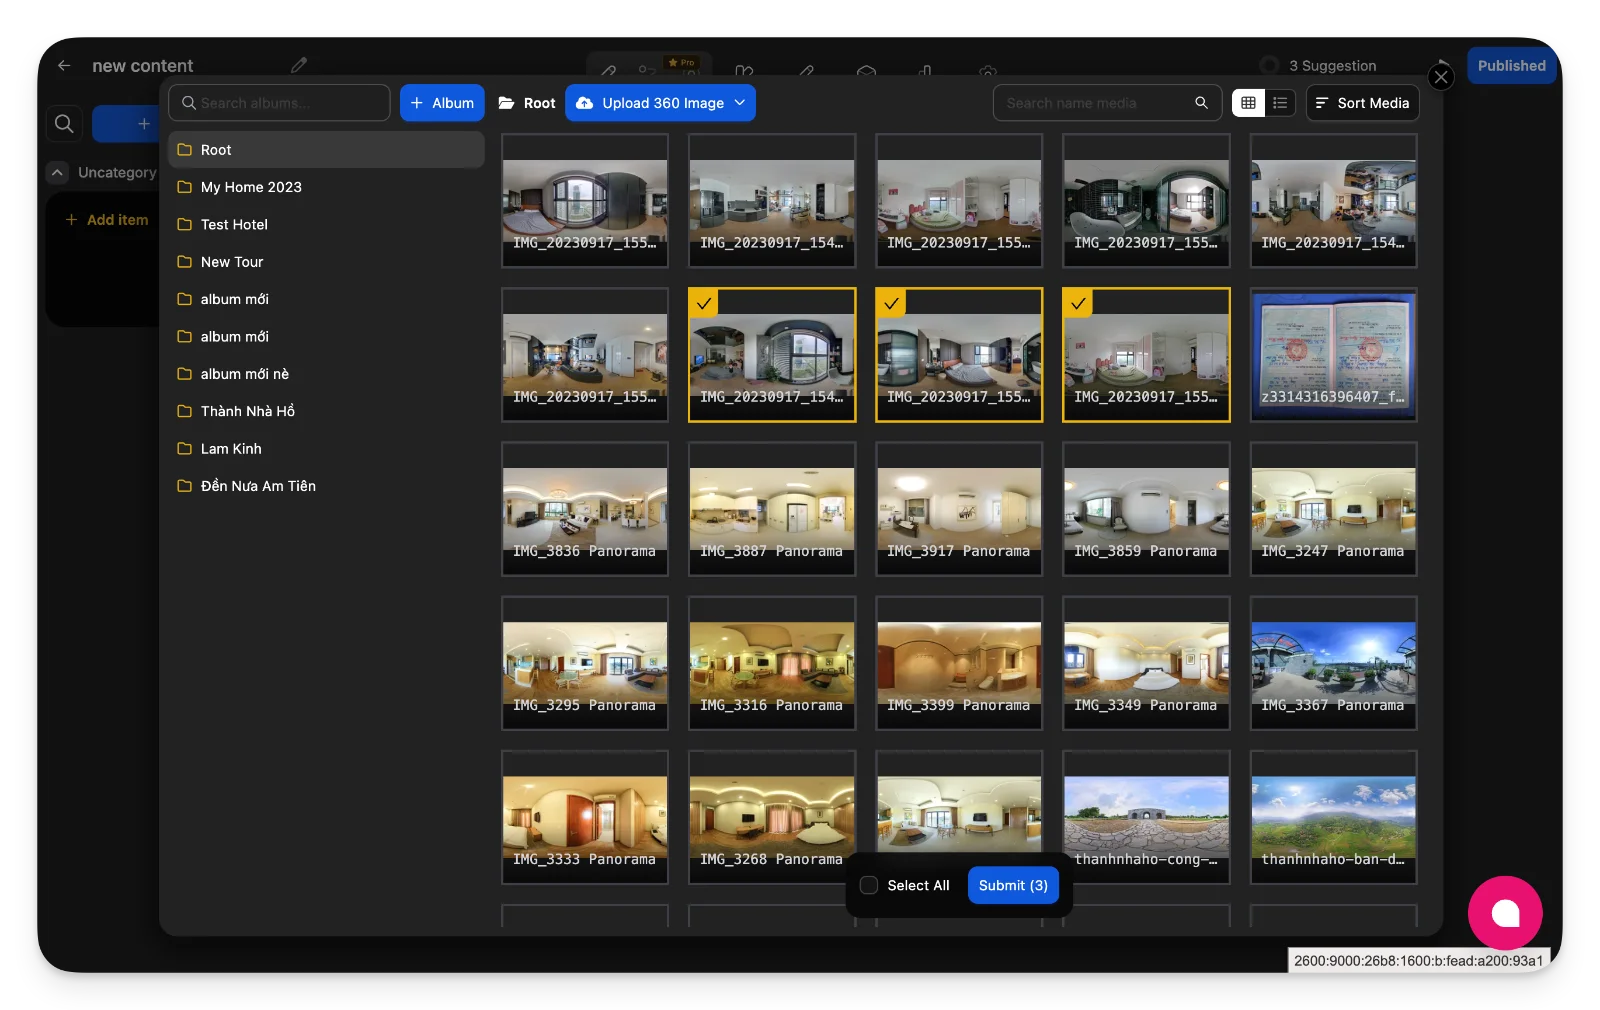
-
Use Upload 360 Image to add files
-
Ensure images are in 2:1 ratio for proper display
-
Select multiple images and click Submit to continue
-
-
Generate scenes from selected images
Once images are selected, Panoee automatically creates scenes for your virtual tour.
Each panorama becomes one scene that you can edit and organize later. -
Configure scenes and build your tour
Use the editor interface to customize your virtual tour. The main working areas include: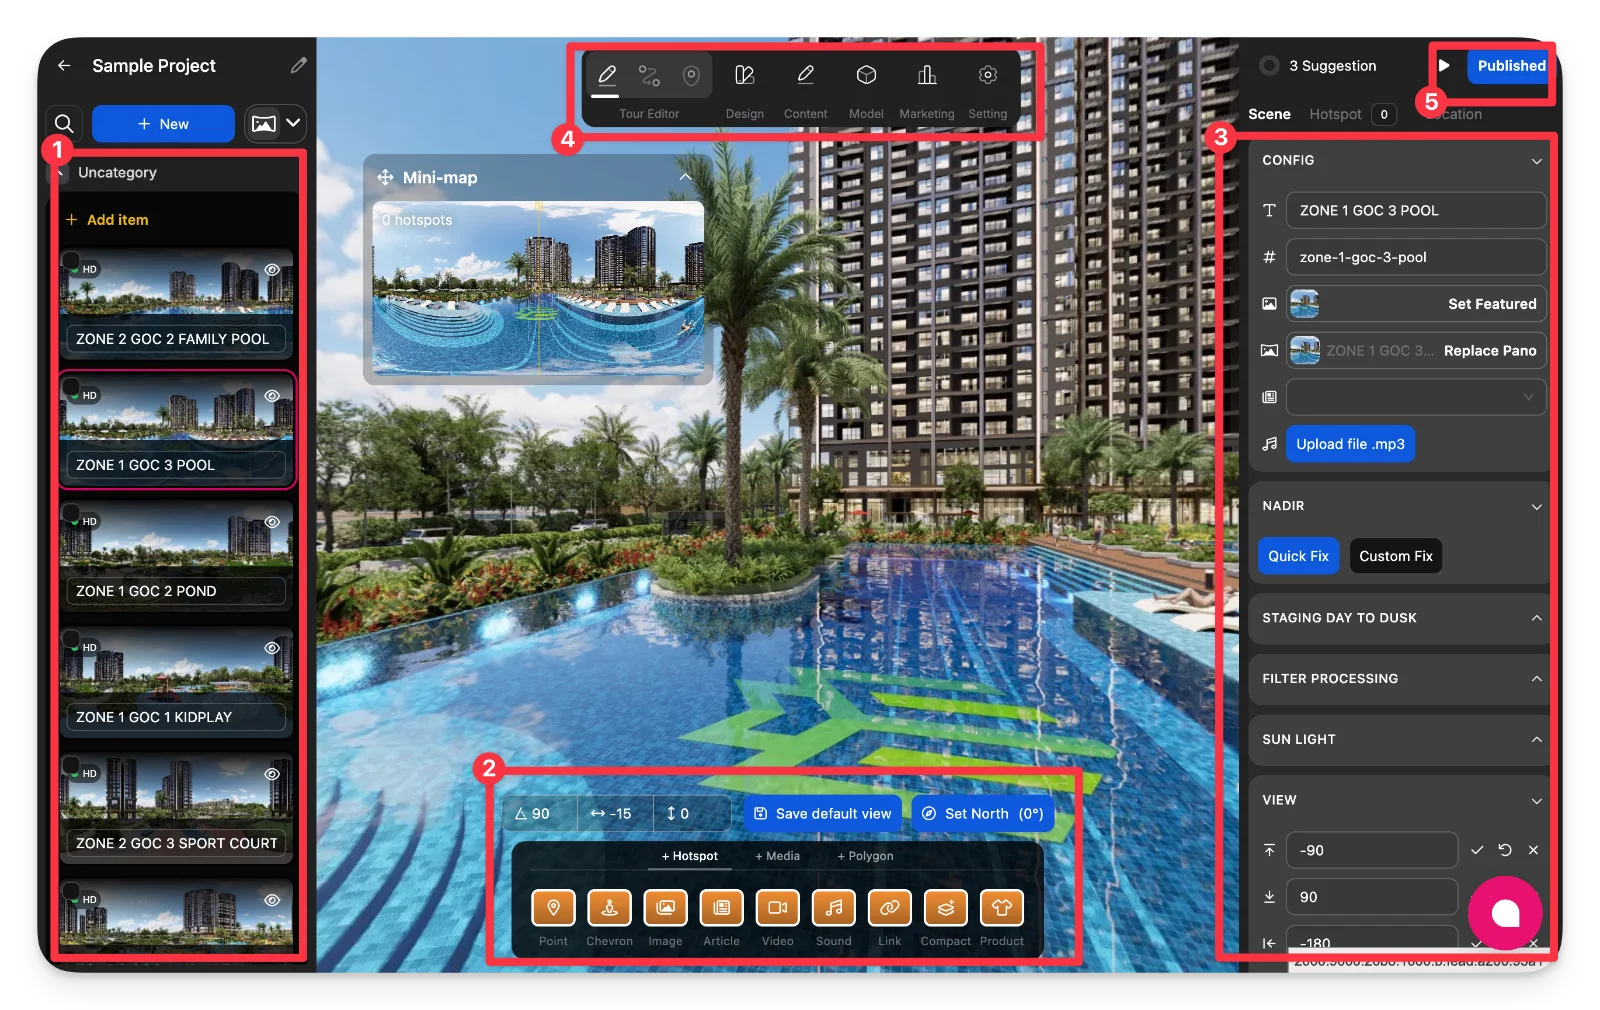
Scene management (1)
View and switch between all scenes in your tour. You can reorder, rename, or select scenes to edit.
Hotspot & interaction tools (2)
Add interactive elements such as:
-
Navigation points (move between scenes)
-
Images, videos, articles
-
Audio (background or per scene)
-
External links or product highlights
Scene configuration panel (3)
Adjust detailed settings for each scene:
-
Scene title and identifier
-
Replace panorama image
-
Set featured scene
-
Upload background audio
-
Nadir settings (logo/floor fix)
-
Lighting, filters, and view angles
Top navigation (4)
Switch between different sections of the project:
-
Tour Editor
-
Design
-
Content
-
Model
-
Marketing
-
Settings
Publish access (5)
Use this button anytime to open publishing options for your tour.
-
-
Publish and share your tour
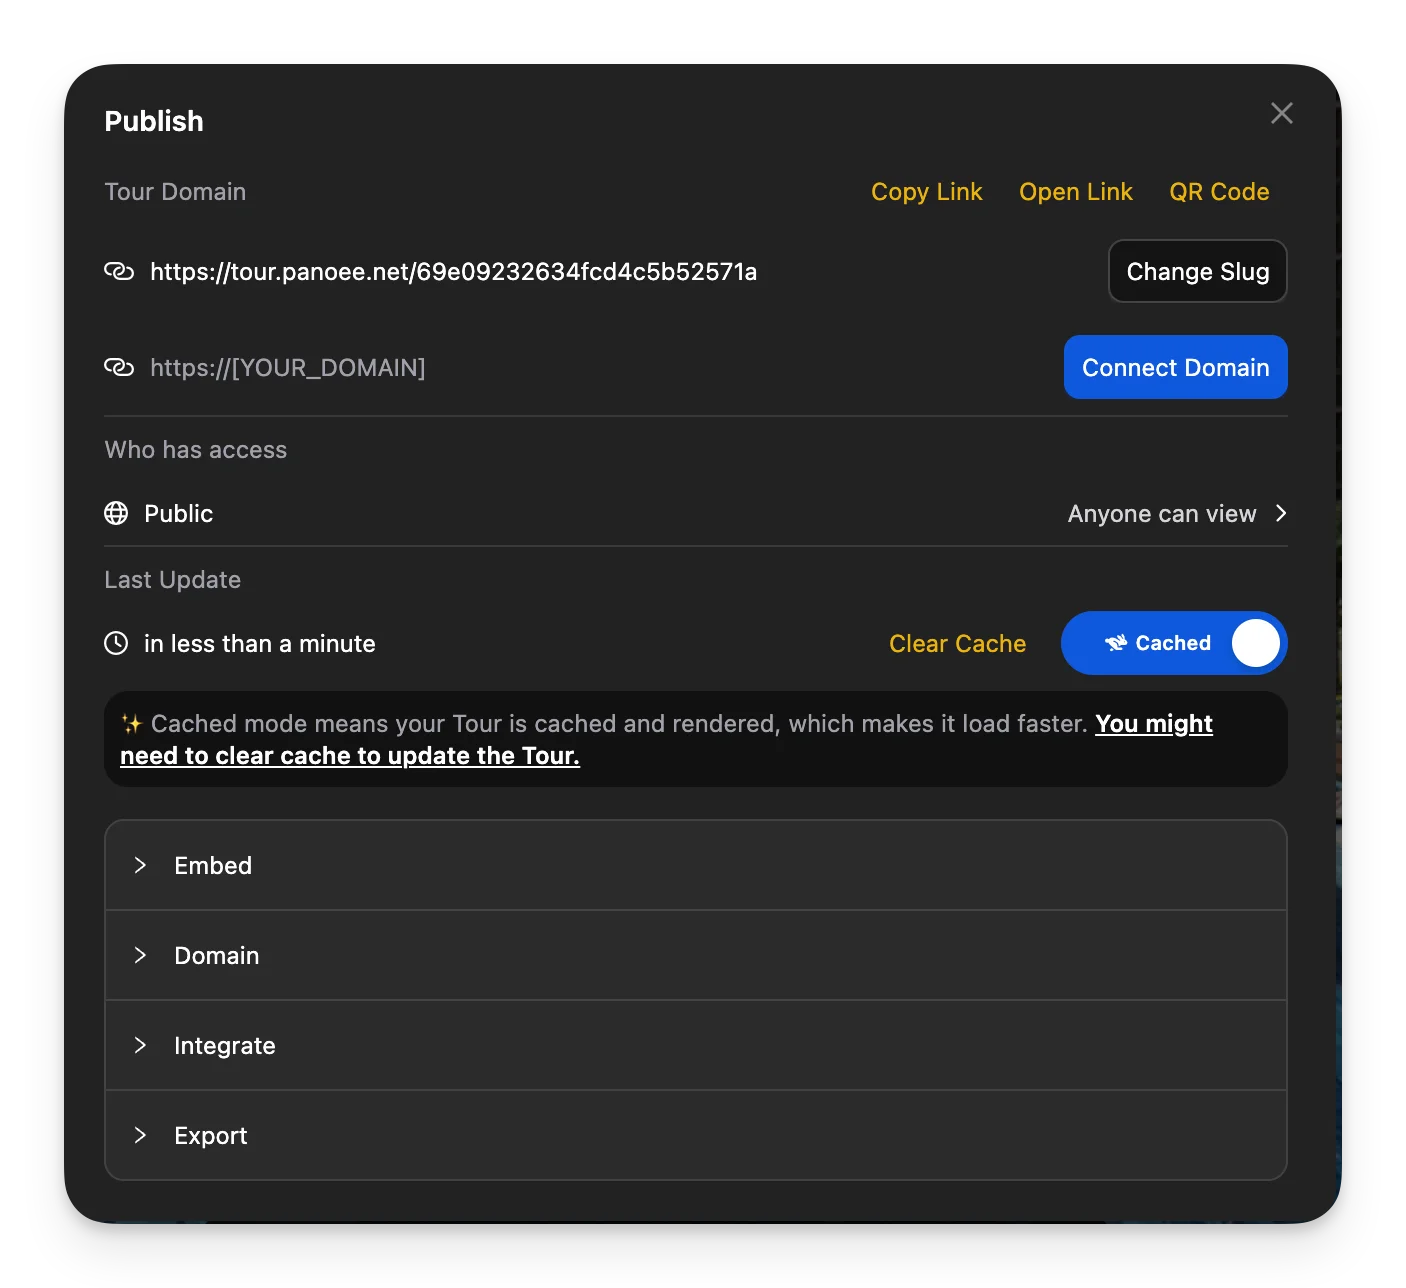
Click Published to open the publish panel. From here you can:
-
Copy the public tour link
-
Open the tour in a new tab
-
Generate a QR code
-
Connect a custom domain
-
Enable embed options for websites
You can also manage:
-
Access level (public/private)
-
Cache settings (clear cache if updates are not visible)
-
Notes
-
Always upload high-quality 360 images with a 2:1 ratio.
-
Scenes are automatically created but can be edited anytime.
-
Use hotspots to create navigation between scenes for a better user experience.
-
Enable Auto Rotate or Follow Mode for more dynamic viewing.
-
If your changes don’t appear after publishing, use Clear Cache.
-
You can continuously update and republish your tour without creating a new project.